Netcomm NF4V/NF18ACV
To install the router:
1. Connect Router to power
2. Connect the WAN port on the router to port 1 on your ONT with an Ethernet cable
3. Check the bottom of the router, you will see a label as shown in the picture below.
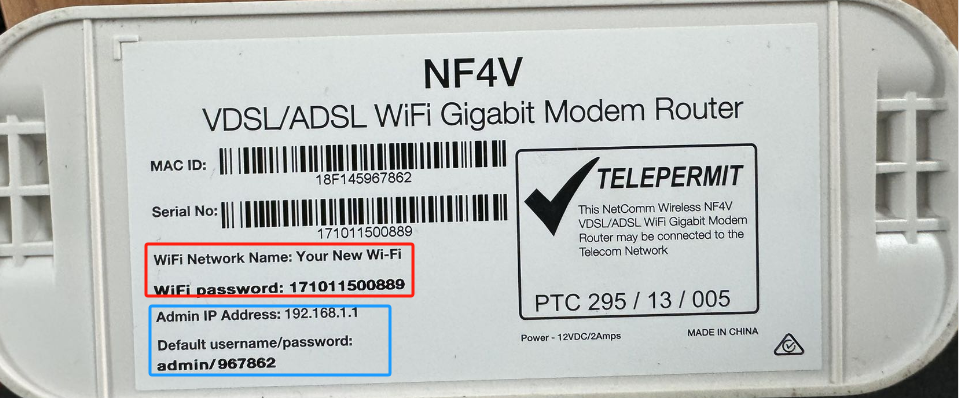
4. Please connect the router with the WiFi details as shown in the red block of the picture.
To set the router up:
1. Launch your Web Browser (e.g.: Internet Explorer, Chrome or Firefox).
2. Type the IP address as shown in blue block of the picture above (for example, it will be 192.168.1.1 for the picture above) into the address bar. Press the ENTER key.
3. Login to the modem page:
The login details is also shown on the label of your router.
For example, for the case shown in the picture above
The Username is admin
The password would be 967862. So please check the label on your router for the password.
6. If that Username and Password do not work you should RESET the modem to factory settings (see the instructions below).
7. Click the Log In
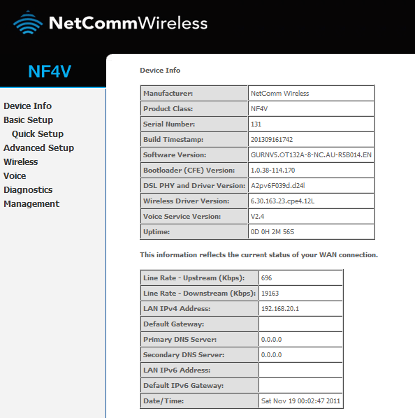
The modem’s Dashboard screen displays.
Configure the modem for Hotshot:
1. From the menu on the left, click Advanced Setup.
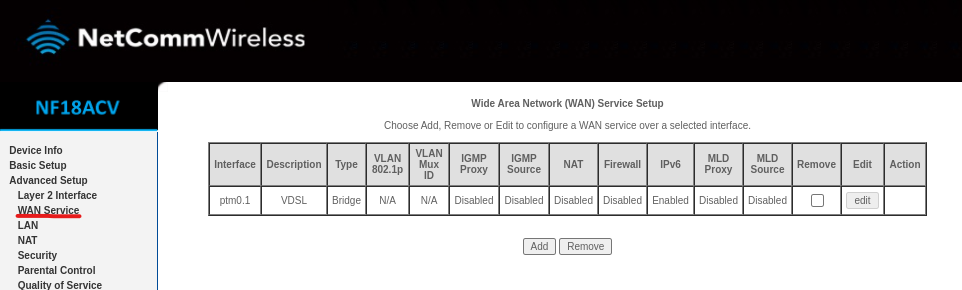
2. Remove all old WAN services if there are any present.
2.1 Click on WAN service.
2.2 Tick each interface that is present.
2.3 Click remove.
3. Check to see that there are no old ETH interfaces. If there are, remove them with the steps below:
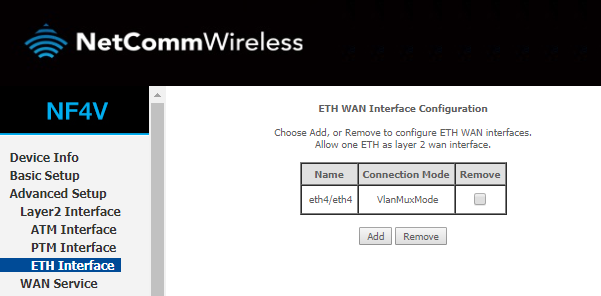
3.1 Click ETH Interface
3.2 Tick the remove box(es)
3.3 Click remove.
4. Add your new ETH interface.
4.1 Click ETH Interface.
4.2 Click the Add button under the ETH interface.
5. Enter the required settings for your new ETH interface.
5.1 Select eth4/eth4.
5.2 Click Apply/Save.
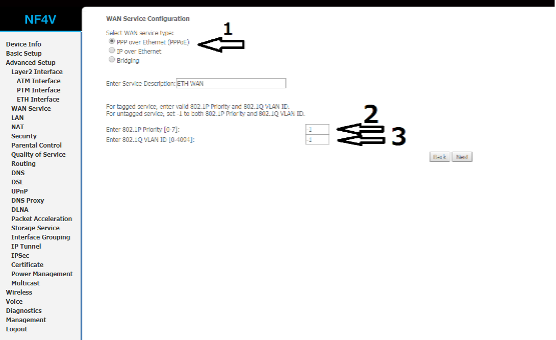
6. Navigate back to WAN service.
6.1 Click Add
7. Select your new ETH interface.
7.1 Select eth4/eth4.
7.2 Click Next.
8. Enter a service name if desired.
8.1 Select PPP over Ethernet.
8.2 Enter Priority -1 and VLAN ID -1.
8.3 Change the service name if desired, or leave on the default and click Next.
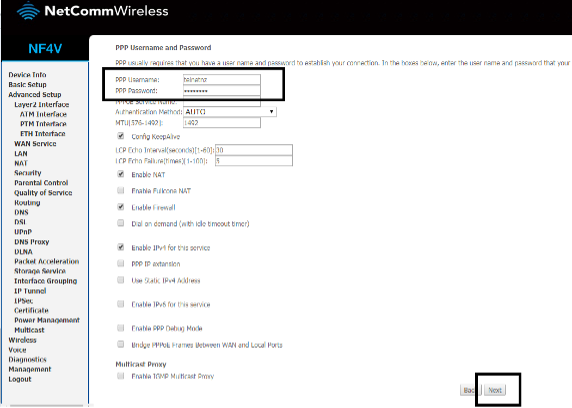
9. Enter a PPP username and password.
9.1 Enter a PPP username and password. These can be anything you like, but cannot contain special characters or be left blank.
Set authentication method to AUTO and MTU to 1492.
Your PPPoE Credential is (Upper case sensitive):
Username: hotshot
Password: hotshot
9.2 Click Next.
10. Ensure ppp0.1 is in the left column, and click Next.
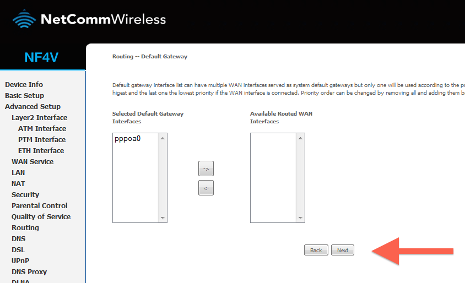
10.2 You are all set! Proceed until you find the option to Apply/Save.
If your internet is still not working after you have done all of the above, please reach out to our customer support before proceeding to the steps below.
10.4 Check your DNS setting
For some Netcomm Wireless router, the factory default DNS settings are not working for New Zealand fibre and must be changed.
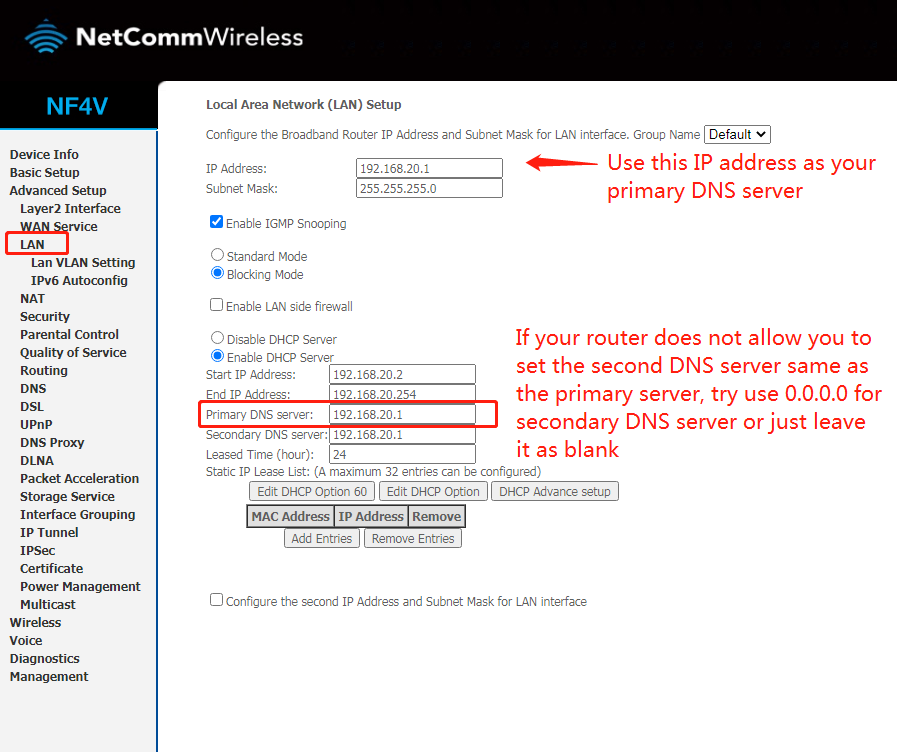
10.4.1 Click LAN in the left menu
10.4.2 Change the Primary DNS Server and the Secondary DNS Server and make sure they are same like your LAN IP Address, if your router does not allow you to use the same ip address for both Primary and Secondary DNS server, you could just input 0.0.0.0 for Second DNS Server while keep the Primary DNS Server same as the LAN IP Address
10.4.3 Click Apply/Save
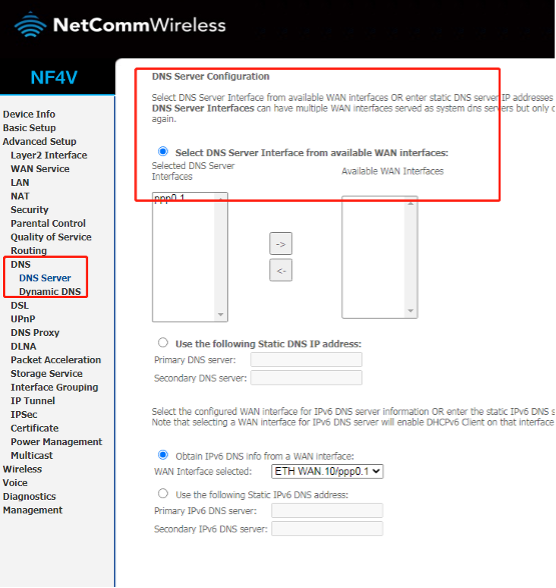
10.4.4 Clik the DNS in the left menu, make sure you do not use any static DNS IP address,then click Apply/Save
11. Reboot your router.
11.1 Click Reboot in the bottom left menu.
11.2 Click the reboot button.

Your router should now restart.
